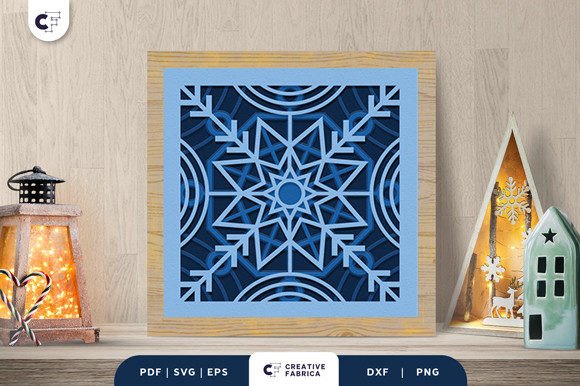
Creating a Stunning Intricate Snowfall Mandala Light Box: A Guide to Flawless Winter Decor
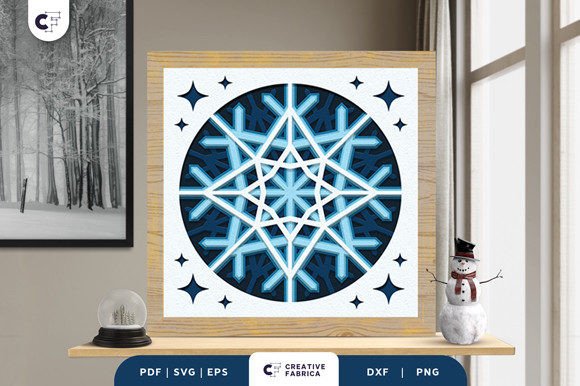
There is something undeniably magical about the way light filters through layers of paper, transforming a flat design into a three-dimensional scene. If you are looking for a thematic winter Cricut idea that stands out from the typical holiday ornaments, the Intricate Snowfall Mandala Light Box is an exceptional choice. This project captures the ethereal beauty of snowflakes in a remarkable way, using an intricate 3D design to cast enchanting shadows that transport viewers straight into the heart of winter. However, while the final result is breathtaking, the journey from a digital file to a finished shadow box often trips up even experienced crafters. Understanding the nuances of this specific project can save you time, materials, and frustration.
Understanding the Complexity of Layered Designs
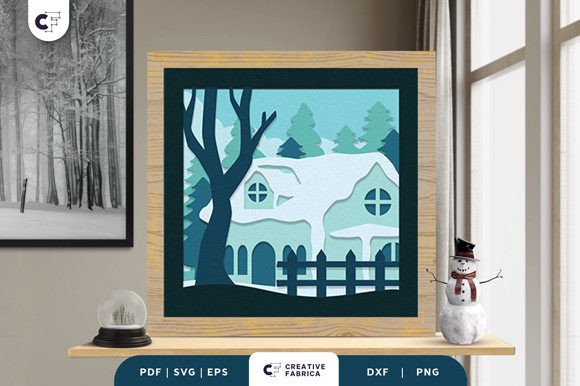
The Intricate Snowfall Mandala Light Box is not your standard single-layer cut. It is a sophisticated assembly consisting of four distinct layers, each playing a critical role in creating depth and dimension. When you download this Winter Shadow Box, you will receive files in SVG, PDF, EPS, PNG, and DXF formats, sized at 20.32×20.32 cm. While having multiple format options is convenient, a common mistake beginners make is assuming all files behave the same way across different software platforms.
Many crafters rush to upload an SVG file without checking how their specific cutting machine interprets the layers. In complex mandala designs, what looks like a continuous pattern on your screen might be interpreted as hundreds of tiny, disconnected pieces if the file isn't grouped correctly. This oversight can lead to a cutting mat covered in loose confetti rather than a cohesive snowflake pattern. To avoid this, always preview your design in the "Layers" panel of your design software before sending it to the machine. Ensure that each of the four layers is distinct and that any intricate inner details are properly attached to their parent shapes if necessary.
The Critical Role of Paper Weight and Texture
Perhaps the most significant factor influencing the quality of your shadow box is the material you choose. A frequent error in paper crafting is using standard copy paper or lightweight cardstock for structural layers. These materials simply cannot support the tension required for 3D assembly and often warp when glue is applied, ruining the clean lines of the mandala.
For the Snowflakes Pattern Shadow Box, rigidity is key. The recommended standard is Encore Cardstock 80 lb cover (216 gsm). This weight provides enough stiffness to hold the layered spacing without bowing, yet it is thin enough to allow light to pass through effectively. If you substitute this with a heavier 110 lb cardstock, you may find that your light box becomes too opaque, blocking the very shadows that make the design enchanting. Conversely, using anything lighter than 65 lb may result in a flimsy structure that collapses under its own weight. Before you start cutting, verify that your chosen paper matches these specifications to ensure the durability and visual impact of your final piece.
Assembly Pitfalls: Glue Application and Alignment
Once your pieces are cut, the assembly phase begins, and this is where patience becomes your most valuable tool. The instructions indicate that you will need PVA glue to craft this shadow box. A common misunderstanding here is the amount of adhesive used. Many crafters, eager to secure the layers quickly, apply large dots or thick lines of glue. In an intricate design like this, excess glue can seep out from between the layers, creating visible stains that distract from the delicate snowflake patterns.
A better approach is to use a fine-tip applicator bottle or a toothpick to apply microscopic dots of PVA glue only to the contact points specified by the design overlap. Furthermore, alignment is crucial. Because the Intricate Snowfall Mandala Light Box relies on the precise stacking of four layers to create its 3D effect, even a millimeter of shift can throw off the entire symmetry. Do not press the layers together immediately after applying glue. Instead, place the layer gently, check the alignment against the layer beneath it, and then press down firmly once you are certain everything is centered. Using tweezers can be incredibly helpful for positioning the smaller, more delicate inner mandala pieces without smudging the paper with your fingers.
Lighting Considerations and Final Presentation
The ultimate goal of this project is to create a luminous display, yet many creators overlook the lighting source until the very end. The note accompanying the design wisely mentions that final product color may vary slightly due to lighting sources. This is not just a disclaimer; it is a design consideration. The warmth or coolness of your light bulb will drastically change the mood of the snowflakes.
If you use a harsh, cool-white LED, the shadows may appear too stark and clinical, losing the "ethereal" quality described in the design concept. On the other hand, a warm, soft white bulb often enhances the cozy winter vibe, making the shadows feel deeper and more inviting. Before permanently sealing your light box or mounting it in its final location, test it with different bulbs. Additionally, ensure your light source is evenly distributed behind the box. A single pinpoint light source in the center can create a "hot spot" that blows out the details of the central mandala, whereas a diffuse panel light ensures every intricate cut is illuminated uniformly.
Making the Right Purchase Decision
When you decide to get yours today to elevate your home decorations, it is important to understand exactly what you are buying. You are purchasing a digital template, not a physical pre-made box. This distinction is vital for managing expectations. Some users mistakenly believe they are ordering a finished decor item, only to realize they need a Cricut cutting machine and supplies to bring it to life.
Before downloading, confirm that you have access to the necessary hardware and materials. If you do not own a cutting machine, consider whether the investment makes sense for a single project or if you might benefit from visiting a local maker space. Also, keep in mind that the images provided online are for preview purposes only. The actual experience of cutting and assembling requires a hands-on approach. By preparing your workspace, gathering your 80 lb cardstock, and setting aside uninterrupted time for assembly, you ensure that the process is as enjoyable as the result.
Crafting the Intricate Snowfall Mandala Light Box is a rewarding endeavor that blends technical precision with artistic expression. By paying attention to file preparation, selecting the correct cardstock weight, applying glue with care, and choosing the right lighting, you can avoid common pitfalls and produce a stunning piece of art. Whether you are a hobbyist looking for a weekend project or a small business owner aiming to create unique seasonal inventory, this shadow box offers a perfect blend of challenge and beauty. Take the time to do it right, and let the enchanting shadows of winter brighten your space.